Useful knowledge about hydrocolloid Dressings
By Nancy Morgan, RN, BSN, MBA, WOC, WCC, DWC, OMS
Each month, Apple Bites brings you a tool you can apply in your daily practice.
Description
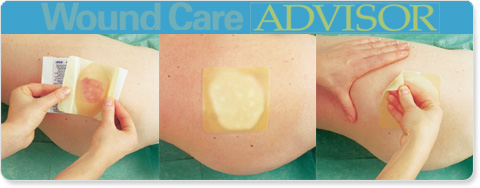
A hydrocolloid dressing is a wafer type of dressing that contains gel-forming agents in an adhesive compound laminated onto a flexible, water-resistant outer layer. Some formulations contain an alginate to increase absorption capabilities. The wafers are self-adhering and available with or without an adhesive border and in various thicknesses and precut shapes for such body areas as the sacrum, elbows, and heels. Click here to see examples of
hydrocolloid dressings.
Actions
Hydrocolloid dressings are occlusive, so they provide:
• a moist healing environment
• autolytic debridement
• insulation.
Advantages
 • Impermeable to bacteria and other contaminants
• Self-adherent and mold well (don’t adhere to the wound, only to the intact skin around the wound)
• May be used under venous compression products
• Easy to apply
• Minimally disrupt healing (the dressing can be worn for several days before it needs to be changed. See “Frequency of dressing changes” for more information.)
Disadvantages
• Not recommended for wounds with heavy exudate, sinus tracts, or when infection is present
• Must be used with caution on the feet of patients with diabetes. It’s suggested that hydrocolloid dressings can be used safely on diabetic foot ulcers if 1) they are used only on appropriate wounds after a thorough patient assessment, 2) the wound is superficial with no signs of infection, 3) there is low to moderate exudate, 4) there are no signs or symptoms of ischemia, and 5) dressings are changed frequently
• Assessment can be difficult if the hydrocolloid dressing is opaque
• May become dislodged if the wound produces heavy exudate
• May curl or roll at the edges
• Upon removal, dressing residue may adhere to the wound bed and there may be an odor
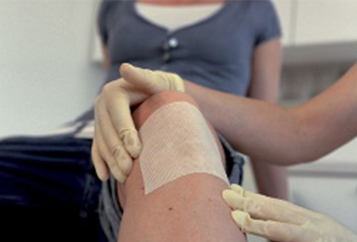
• May cause periwound maceration (see photo)
• May cause trauma/injury to fragile skin upon removal
• May cause hypergranulation
When to use
A hydrocolloid dressing is appropriate for these situations:
• noninfected wound with scant to moderate drainage
• necrotic or granular wound
• dry wound
• partial- or full-thickness wound
• protection of intact skin or a newly healed wound.
Frequency of dressing changes
• Change the dressing every 3 to 7 days depending upon exudate and manufacturer guidelines.
• If daily dressing changes are required, reconsider the appropriateness of this approach because these dressings are designed for extended wear for up to
7 days.
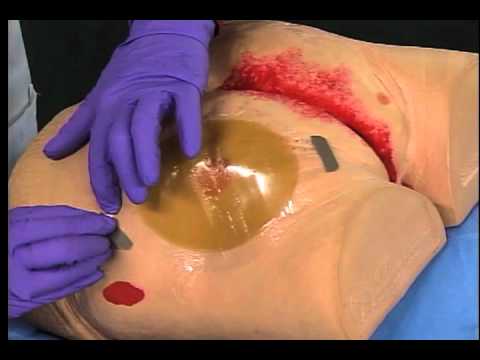
How to apply a hydrocolloid dressing
1 Wash your hands and put on gloves.
2 Remove the soiled dressing (noting the date it was applied) and place it in a trash bag.
3 Remove your gloves, wash your hands, and put on new gloves.
4 Clean the wound with normal saline
solution or prescribed cleanser.
5 Use clean gauze to pat dry the tissue surrounding the wound.
6 Remove your gloves, wash your hands, and put on new gloves.
7 Apply liquid barrier film or moisture barrier to the periwound area.
8 For deep wounds, apply wound filler or packing materials as indicated.
9 Before applying the hydrocolloid dressing, warm it by holding it between your hands to increase adhesive ability.
10 Remove the paper backing from the dressing.
11 Gently fold the dressing in half lengthwise and apply it from the center of the wound outward.
12 Smooth the dressing in place from the center outward. Hold the dressing in place for a few seconds to improve
adhesion.
13 The dressing should be at least 1 inch larger than the wound. (Some manufacturers may require a 2-inch border.)
14 You may apply tape around the edges to secure the dressing.
15 Dispose of the waste.
16 Remove your gloves and discard.
 How to remove a hydrocolloid dressing
1 Press down on the skin and carefully lift an edge of the dressing. Continue lifting around the dressing until all adhesive edges are free.
2 Gently peel away the dressing from
the skin in the direction of the hair growth.